Sunday, February 12, 2017

Magic FSJ Paper Molding

The other day, Fun Stampers Journey president and co-founder Richard Garay demonstrated a really cool technique in this video. I thought about trying to do this in class, but after trying it myself decided it would probably take too long and be on the messy side. So I'll just show you how I did it instead.  (Watch Richard's video to get a much better explanation!) The finished piece is hard to the touch, and can be added to a card or made into a pin or hair ornament. I'll post my finished card later - I still have a few layers of glaze to go!
  1. Smear color onto Whisper White card stock. It's called direct-to-paper inking...just rub your ink pads around on the card stock.
  2. Now stamp your image over the colored area. I'm using the flower from Peach Blossom (SS-0342).
  3. Smear Journey Craft Glue over back of image. (I know, I know....lot of smearing going on!) Cover the entire surface with a thin layer - use the spreader on the "bottom" of the glue bottle.  Glue to another sheet of card stock.
  4. Repeat step 3 until you have four layers of card stock glued together with the image on top.  If you'd like, you can use Black Licorice as the last piece of card stock.
  5. Cut out the image, through all four layers of card stock.  Don't let it dry first! Gotta cut while it's wet.
  6. Mold and shape the image with your fingers, giving it a 3D look. Let dry, occasionally re-shaping so it doesn't flatten out.,
  7. If you used Black Licorice card stock as your back layer, blacken the cut edges with a black sharpie.
  8. Thin Journey Glaze with a spritz of water and brush on surface of image.  Give the piece about 8 or 9 layers of glaze, allowing to dry between each layer.
  9. If desired, you can add a bit of Sparkle Dust to the last layer of glaze while it's still wet.
Image stamped over ink smeared on card stock.
Glue image to four layers of card stock. Spread glue thinly over whole surface.
Cut out image while glue between layers is still wet.

Shape with fingers. Continue to shape as image dries to create 3D look.
Brush with thinned Journey Glaze and let dry.  Repeat for 8 or 9 layers of glaze.
I'm working on this butterfly, too, but I think I like the Peach Blossom better so far!


Wednesday, February 8, 2017

Stamp of the Month Challenge

From the Heart Stamps hosts a Stamp of the Month Challenge on their blog - if you participate one month, you receive the free digital stamp for the next month.  There's also a weekly sketch challenge.  They have lots of adorable digital stamp sets, and are based here in Colorado.

This month's challenge was to create a card using Hogs and Kisses Pigwit, so here's my card.  This time I created it the front panel digitally, then did a touch of Copic coloring on Pigwit and mounted it to a card base. I think he came out kind of cute!


If you're interested in the challenges, take a peek at the FTHS blog.  Here's a link to this month's challenge and all the entries: http://fromtheheartstamps.com/community/2017/02/01/free-stamp-of-the-month-february-2017-hogs-kisses-pigwit/.

Sunday, February 5, 2017

Bloom Box Club

Had a great class yesterday.  I always love seeing how the ladies put their own individual touches on the cards, and enjoy the great socialization.  I'm blessed with a really NICE bunch of people!!  Our newest member, Shirley, mentioned how much she enjoyed everyone and how helpful they all are.


At our class I shared these cards I made using the Glass Blooms set and following the February 2016 Bloom Box samples.

If you're interested in getting together, making cards, and learning new techniques, Deb is starting a Bloom Box Club.  You can sign up for a Bloom Box subscription on her website (www.funstampersjourney.com/DebMuniz), then join us every month when we get together to make the cards.  The subscription is for 6 months, and then continues month by month unless you cancel it. The cost is $24.95 per month. With shipping and tax, mine came to $33.14.


Your Bloom Box will be delivered to your address automatically each month.  It contains a full-sized red rubber stamp set and all the paper and embellishments needed to make 4 cards, along with a full-color booklet of instructions. We'll provide ink and any other necessary supplies at the club meeting.

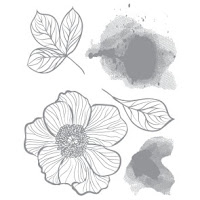
Everyone who signs up for Bloom Box during the month of February will receive this set:
This is the month that finally tipped ME over the edge! Not sure if I love the colors or the image best. The actual stamp set will be available to anyone in May, but Bloom Box sets are exclusive for three months.

Saturday, January 28, 2017

February Card Class

February card class coming up next week - these are the cards we'll be making.
Inspired by/CASEd from Jenny Watson,
http://stampingjourneywithjenny.com/1/category/leadership%20retreat/1.html
Inspired by/CASEd from Char Leasor
http://charsjourney.com/index.php/2016/08/14/can-case-133-color-challenge/
Add caption

Wednesday, January 25, 2017

Down by the Sea

 
I had a couple of thank you cards to make, and somehow seahorses seemed "right" today!

Monday, January 23, 2017

CASE-ing Jeanne Bobish

I've discovered a fellow Fun Stampers Journey coach who makes great cards AND posts daily live how-to videos on FaceBook!  Jeanne Bobish is a very talented lady, and I love her cards.  If you get a chance, check out her teaching videos at 3:30 PM (5:30 PM EST).  Here's a link to her FaceBook page. You can see all her videos by clicking on Photos, and then scrolling down a bit to Videos.  Jeanne Bobish.

Here's a card she made on January 19th.  I love the colors, so decided to Copy And Share Everything - CASE in stamp-talk! CASE-ing is a great way to get started - or keep going - in card making.  You can find amazing cards on Pinterest, FaceBook, or in your handy stamping inspiration catalogs and magazines.  Change as much or as little as you like.  I copied pretty closely this time, just substituting a different sentiment and ribbon.
 
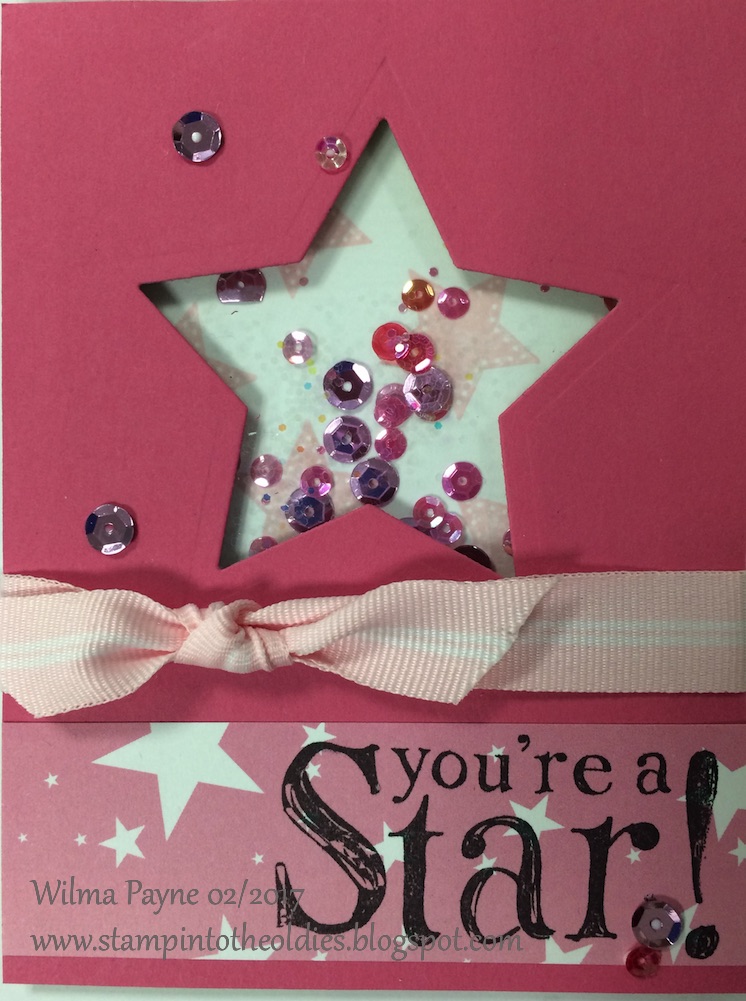
It looks like I'm going to have to work on taking better pictures!  Here's one more I CASEd from one of Jeanne's cards - I switched a few more things around on this one, but followed her layout and made it a shaker card like hers.
 
So...if you get a chance, check out some of her work.

Friday, January 20, 2017

January Technique Blog Hop

Welcome to a Year of Card Techniques 2017

JANUARY-Shaving Cream Marbling

This year I've joined a group of very talented card makers in a year-long series of monthly blog hops.  Each month will focus on a different fun technique.  We're playing with shaving cream and color this month, to create marvelously unique backgrounds for our cards and tags.  This is SO MUCH FUN!  Run - don't walk - to your nearest dollar store and get a couple cans of plain shaving cream.  Try it with different colors of card stock, different kinds of paint or ink or food color.
This is an easy technique - here are the basics:
  1. Squirt some shaving cream into a flat pan or paper plate.  Let it foam up, and smooth it out a bit.
  2. Drip or dribble one or more colors of paint or ink onto the shaving cream, then swirl and mix with a toothpick or the end of a paintbrush.
  3. Lay card stock on surface of shaving cream, and press in lightly with your hands.
  4. Lift card stock off carefully, and set aside for a couple of minutes. (You can press another piece of card stock onto the first one and then pry them apart to double up on the dip!)
  5. Wipe off the shaving cream, and let dry completely.  (At first I tried wiping off the shaving cream with paper towels, but that got pretty messy and used WAY too many paper towels.  I had much better luck using a soft plastic ruler to scrape it off.) 

After the first card, smooth the shaving cream again, add more color, and repeat the process. Each dip reveals a new surprise, and before you know it, you have a whole stack of marbled card stock ready to use. Here are some of the cards I created - and I still have quite a few pieces left for future projects.

This background reminded me of water - so it had to have a mermaid!
The marbling on this one is silver and blue on gray paper.
I went wild with scraps - definitely not my usual style, but kind of fun!
I think this is my favorite - and it was so fast and easy! 
Purple and yellow?   Easter of course!
The colors in the marbled background inspired this card. 
I colored this little digi quite awhile ago.
Seems it was just waiting for the colors in this background!
Thanks so much for stopping by today.  We love to hear from you, so please comment on the blogs to enter for the prize drawing.  This month, one winner will be chosen from all the comments on the hop as of February 4th to receive a Sending Love Designer Series 6x6 Paper Stack and Ribbon Combo from Theresa at ScrapsByGracie.
  

Time now to hop on over and check out what Sandy has done with her marbled masterpieces.  You can use the list below if you happen to get lost along the way!
I hope you'll join the hop again, the third Saturday of each month, for a new technique. We love comments and sharing on social media!