The other day, Fun Stampers Journey president and co-founder Richard Garay demonstrated a really cool technique in
this video. I thought about trying to do this in class, but after trying it myself decided it would probably take too long and be on the messy side. So I'll just show you how I did it instead. (Watch Richard's video to get a much better explanation!) The finished piece is hard to the touch, and can be added to a card or made into a pin or hair ornament. I'll post my finished card later - I still have a few layers of glaze to go!
- Smear color onto Whisper White card stock. It's called direct-to-paper inking...just rub your ink pads around on the card stock.
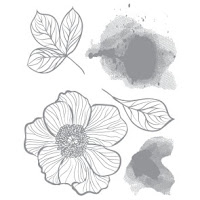
- Now stamp your image over the colored area. I'm using the flower from Peach Blossom (SS-0342).
- Smear Journey Craft Glue over back of image. (I know, I know....lot of smearing going on!) Cover the entire surface with a thin layer - use the spreader on the "bottom" of the glue bottle. Glue to another sheet of card stock.
- Repeat step 3 until you have four layers of card stock glued together with the image on top. If you'd like, you can use Black Licorice as the last piece of card stock.
- Cut out the image, through all four layers of card stock. Don't let it dry first! Gotta cut while it's wet.
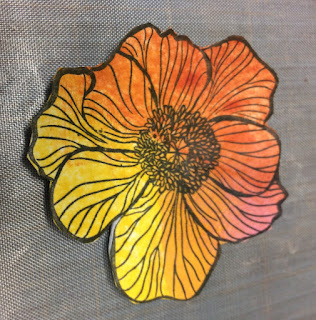
- Mold and shape the image with your fingers, giving it a 3D look. Let dry, occasionally re-shaping so it doesn't flatten out.,
- If you used Black Licorice card stock as your back layer, blacken the cut edges with a black sharpie.
- Thin Journey Glaze with a spritz of water and brush on surface of image. Give the piece about 8 or 9 layers of glaze, allowing to dry between each layer.
- If desired, you can add a bit of Sparkle Dust to the last layer of glaze while it's still wet.
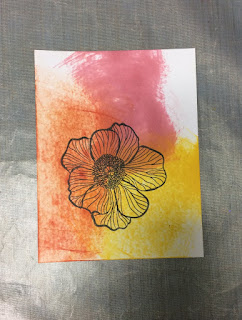 |
| Image stamped over ink smeared on card stock. |
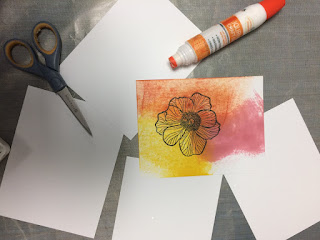 |
| Glue image to four layers of card stock. Spread glue thinly over whole surface. |
 |
Cut out image while glue between layers is still wet.
|
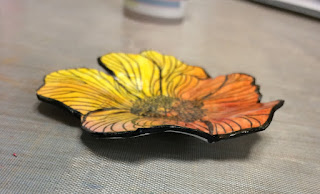 |
| Shape with fingers. Continue to shape as image dries to create 3D look. |
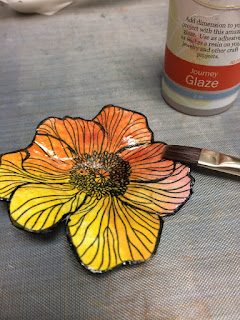 |
| Brush with thinned Journey Glaze and let dry. Repeat for 8 or 9 layers of glaze. |
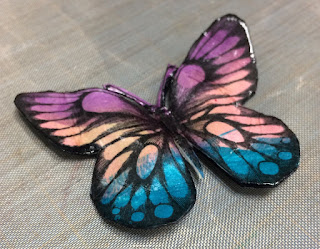 |
| I'm working on this butterfly, too, but I think I like the Peach Blossom better so far! |


No comments:
Post a Comment